Managing Users
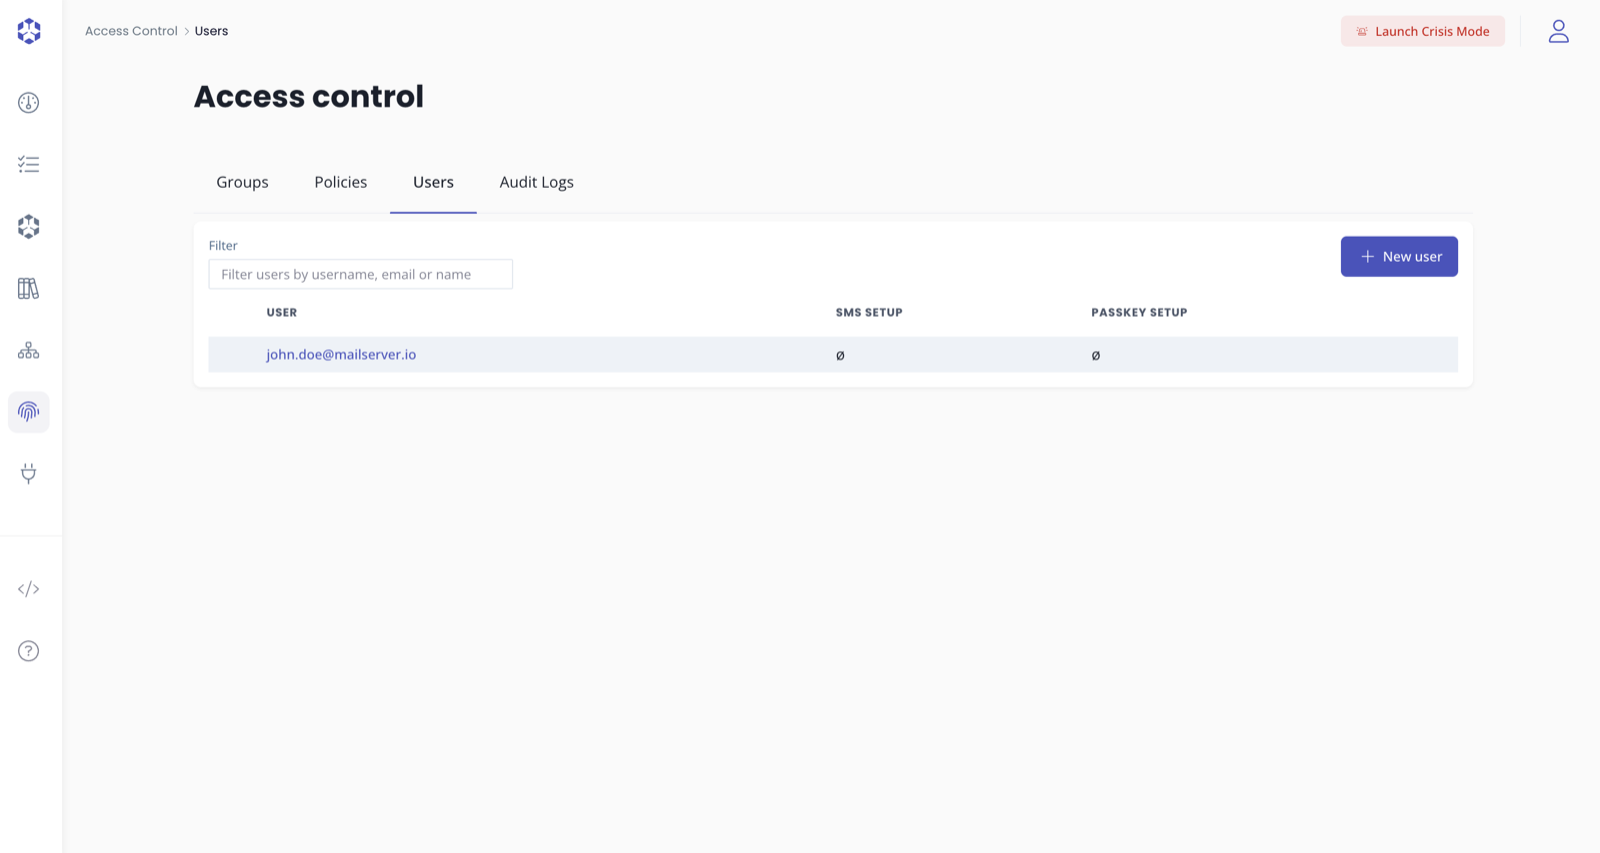
You can manage users by clicking on "Access control" in the left menu. Then, go to the "Users" tab.
Listing users
The list of users shall appear in the "Users" tab that can be accessed as described above.
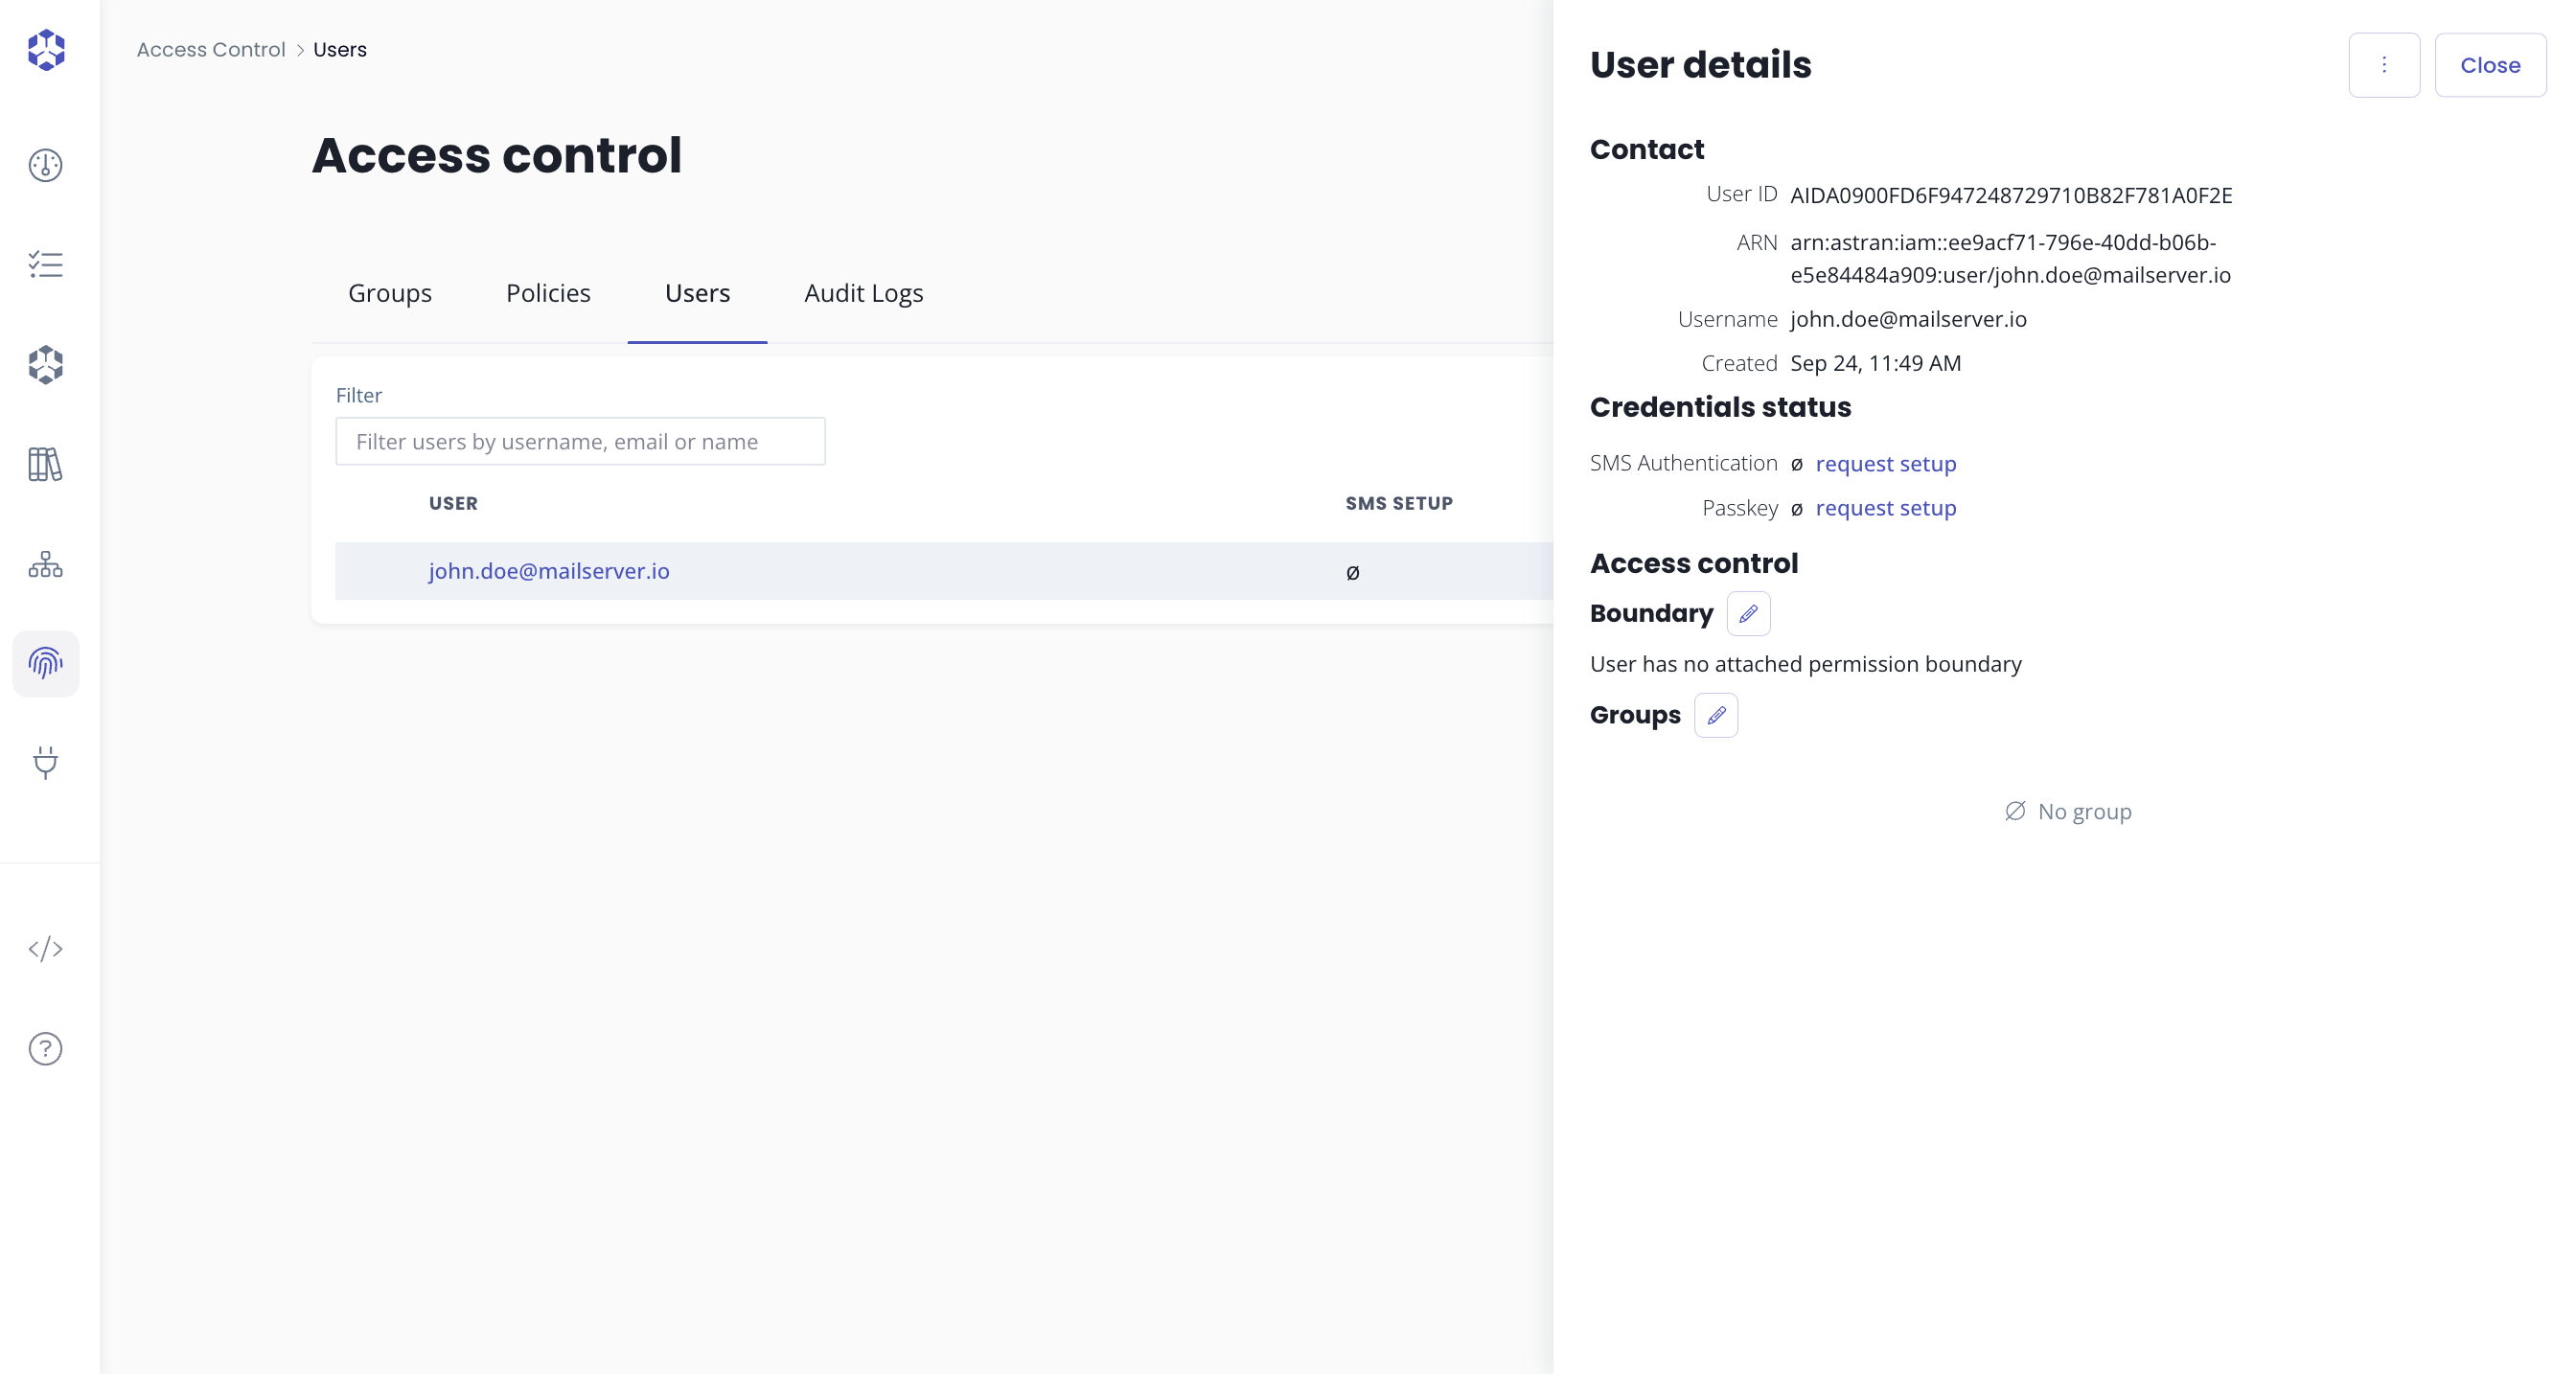
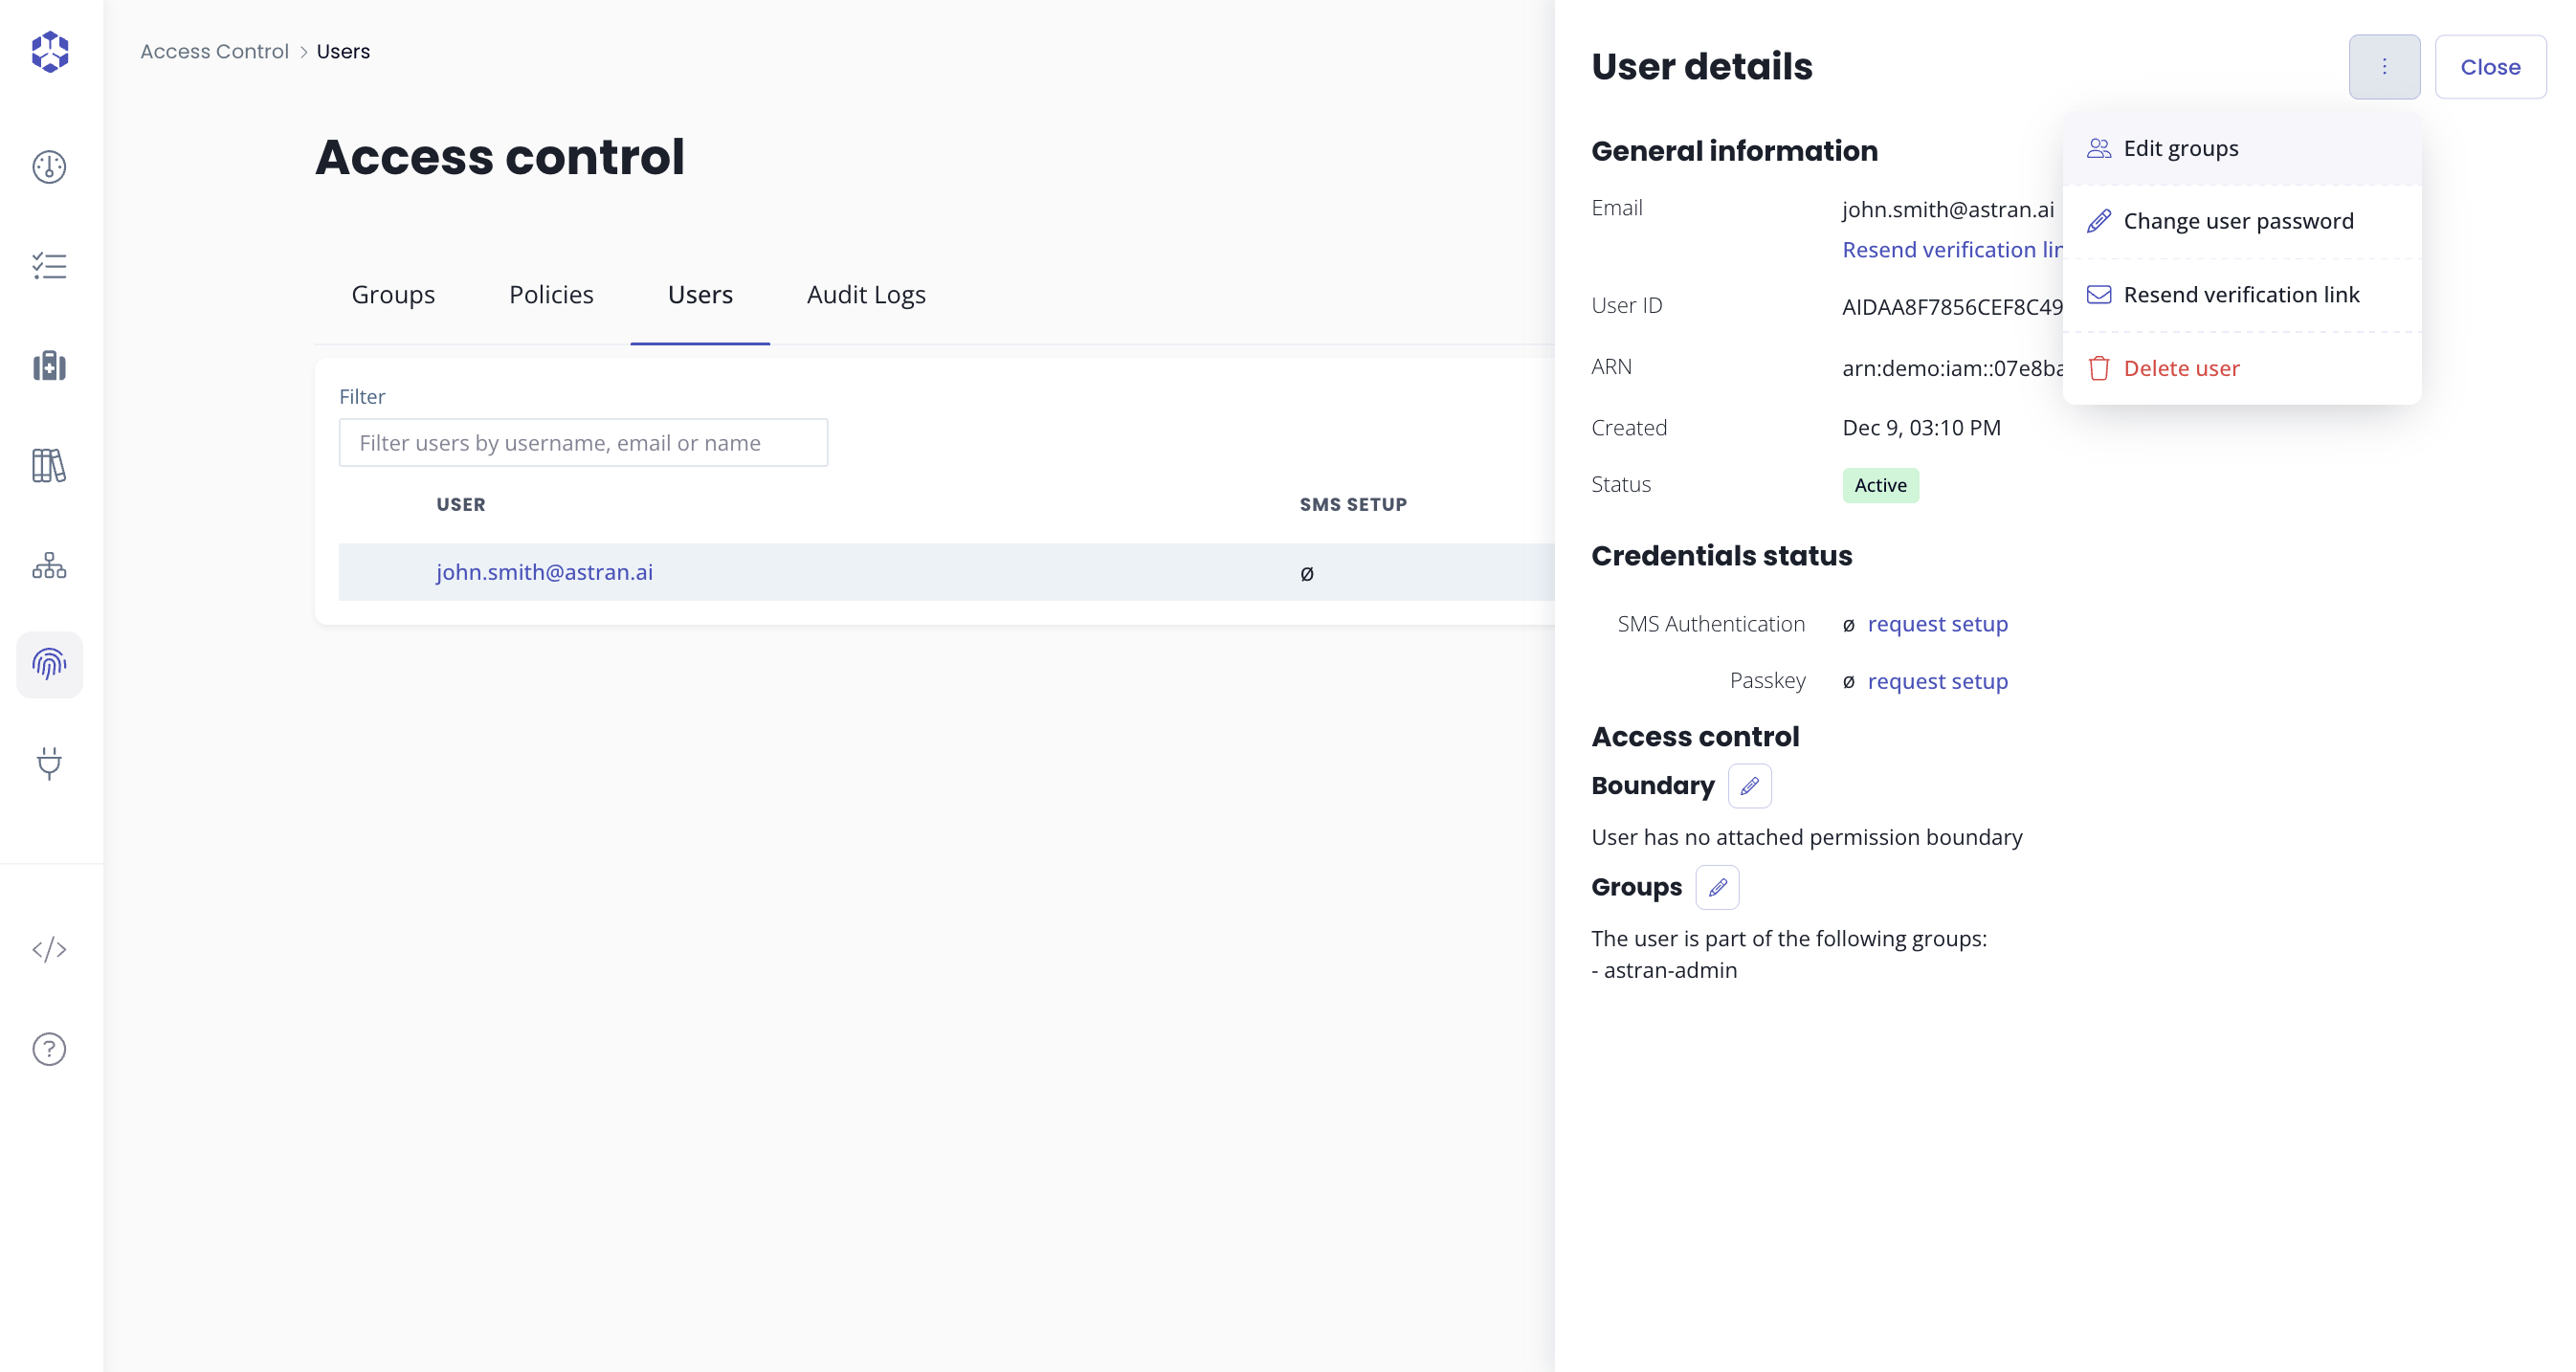
Click on a given user to see the details and the groups the user belongs to.
Creating a new user
- Click on the "New user" button
- A popup will open
- Enter the email address of the user (note that each user must have a different email)
- Select the group(s) you want the user to belong to
- Click on "Create user"
Upon succcessful creation, the user will receive an email to set his password.
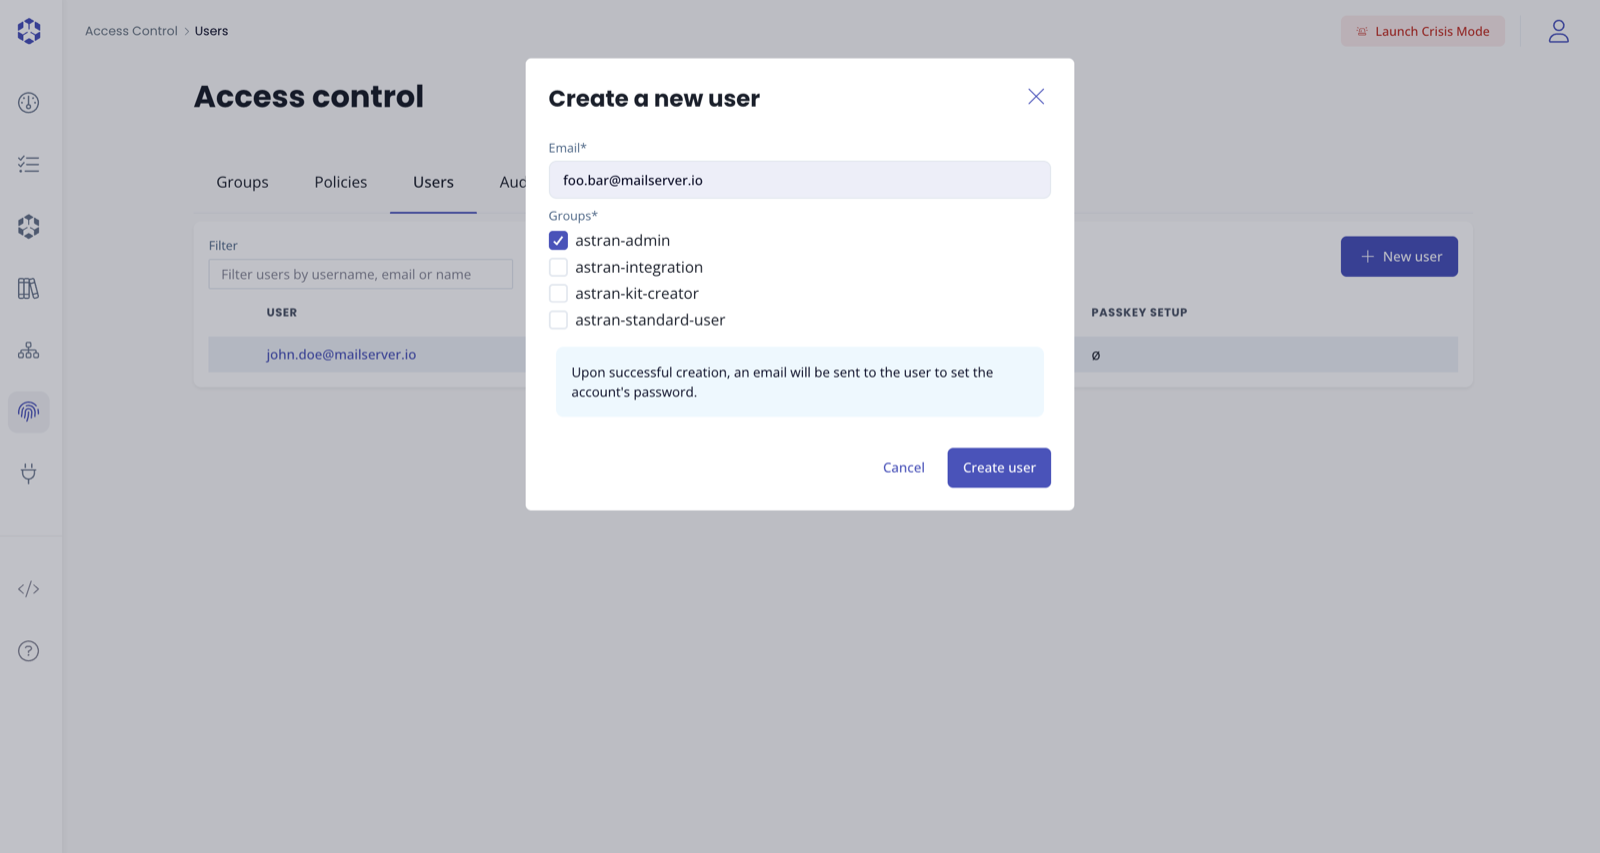
In case you have Permssions boundaries defined, you will be able to attach a boundary to the created user in this modal.
Changing user Groups
- From the list of users, click on a given user to see the details and the groups the user belongs to.
- Click on the edit button (pencil icon) that appears when hovering "Groups".
Alternatively, you can click on the action button, located at the top right and click on "Edit groups".
- Select the groups the users should belong to
Deleting a user
- From the list of users, click on a given user to see the details and the groups the user belongs to.
- Click on the action button, located at the top right and click on "Delete user"
- A confirmation modal will appear for you to confirm your choice.
Once deleted, a user cannot be recovered.
Changing a user password (admin)
If you have sufficient permissions, you can change a user password directly from the user details drawer. This action overrides the current password: the user does not need to know their previous password.
- From the list of users, click on the user to open the User details drawer.
- Click on the actions menu (top-right) and select Change user password.
- Enter the new password and confirm it.
- Click Update, then confirm.
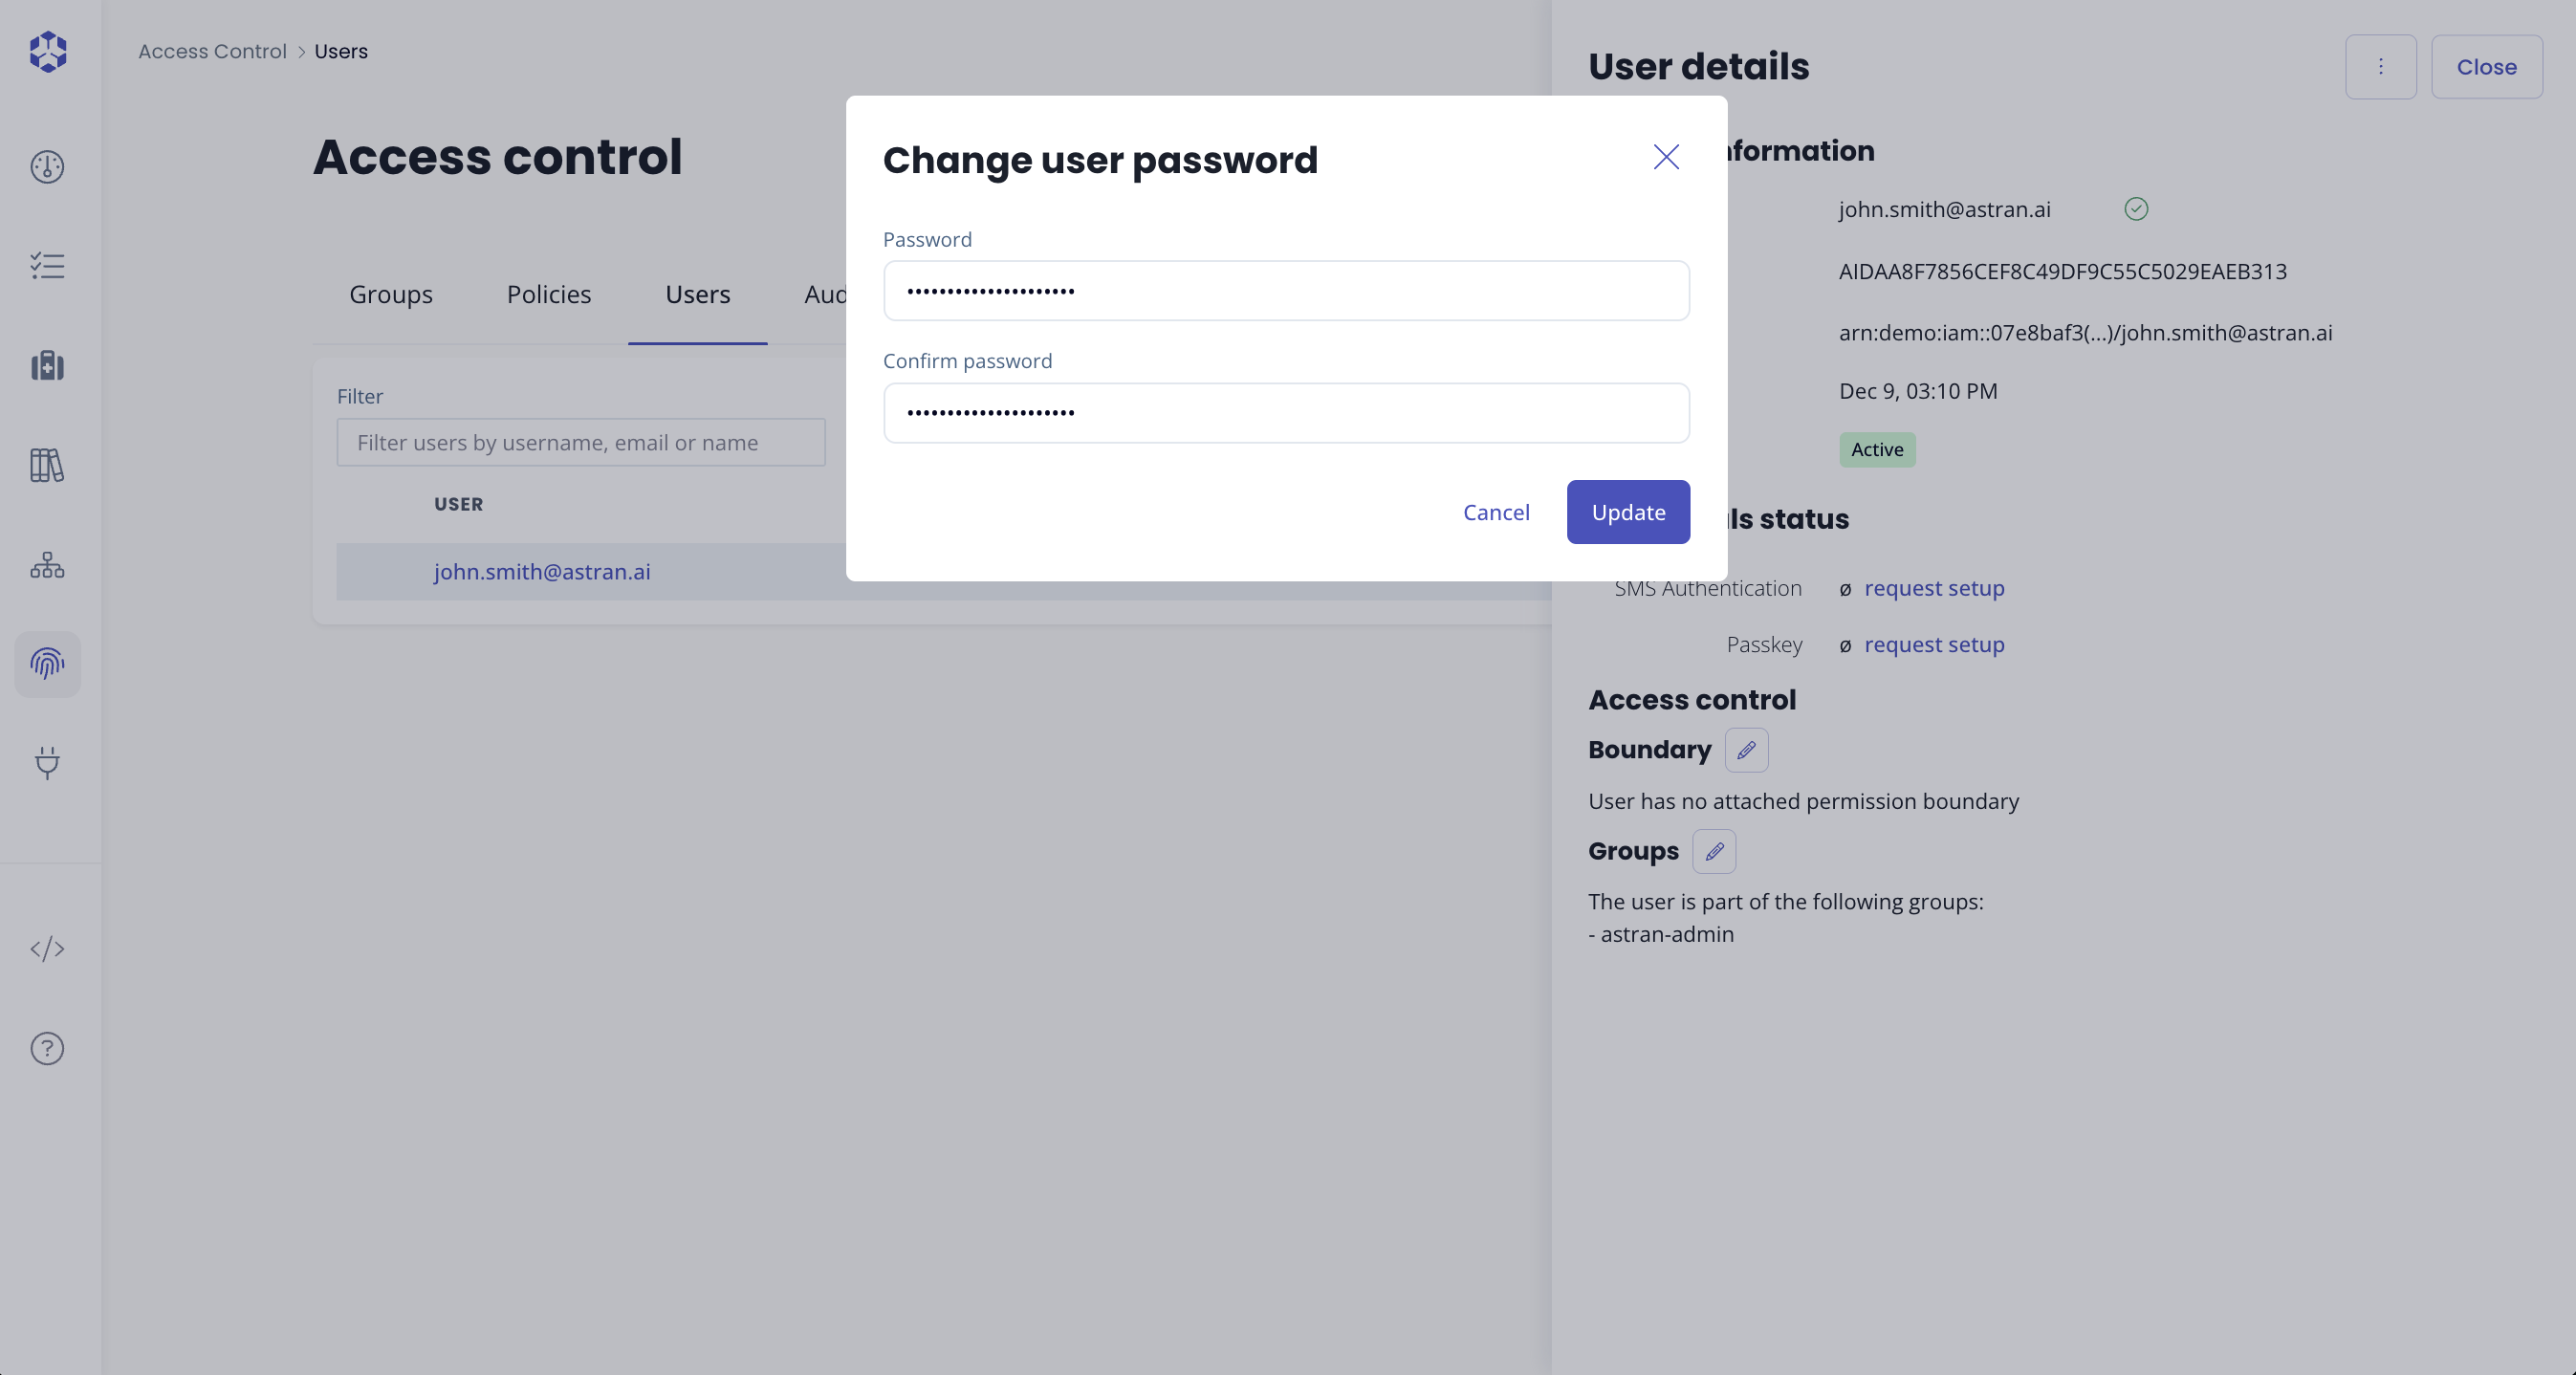
Changing a user's password revokes the current credentials immediately. Only do this if you are sure you want to force a password change.
Resending a verification email (admin)
If a user did not receive their verification email (or the link expired), you can resend a verification email.
- From the list of users, click on the user to open the User details drawer.
- Click on the actions menu (top-right) and select Resend verification link.
- Choose an expiration window.
- Click Send email.
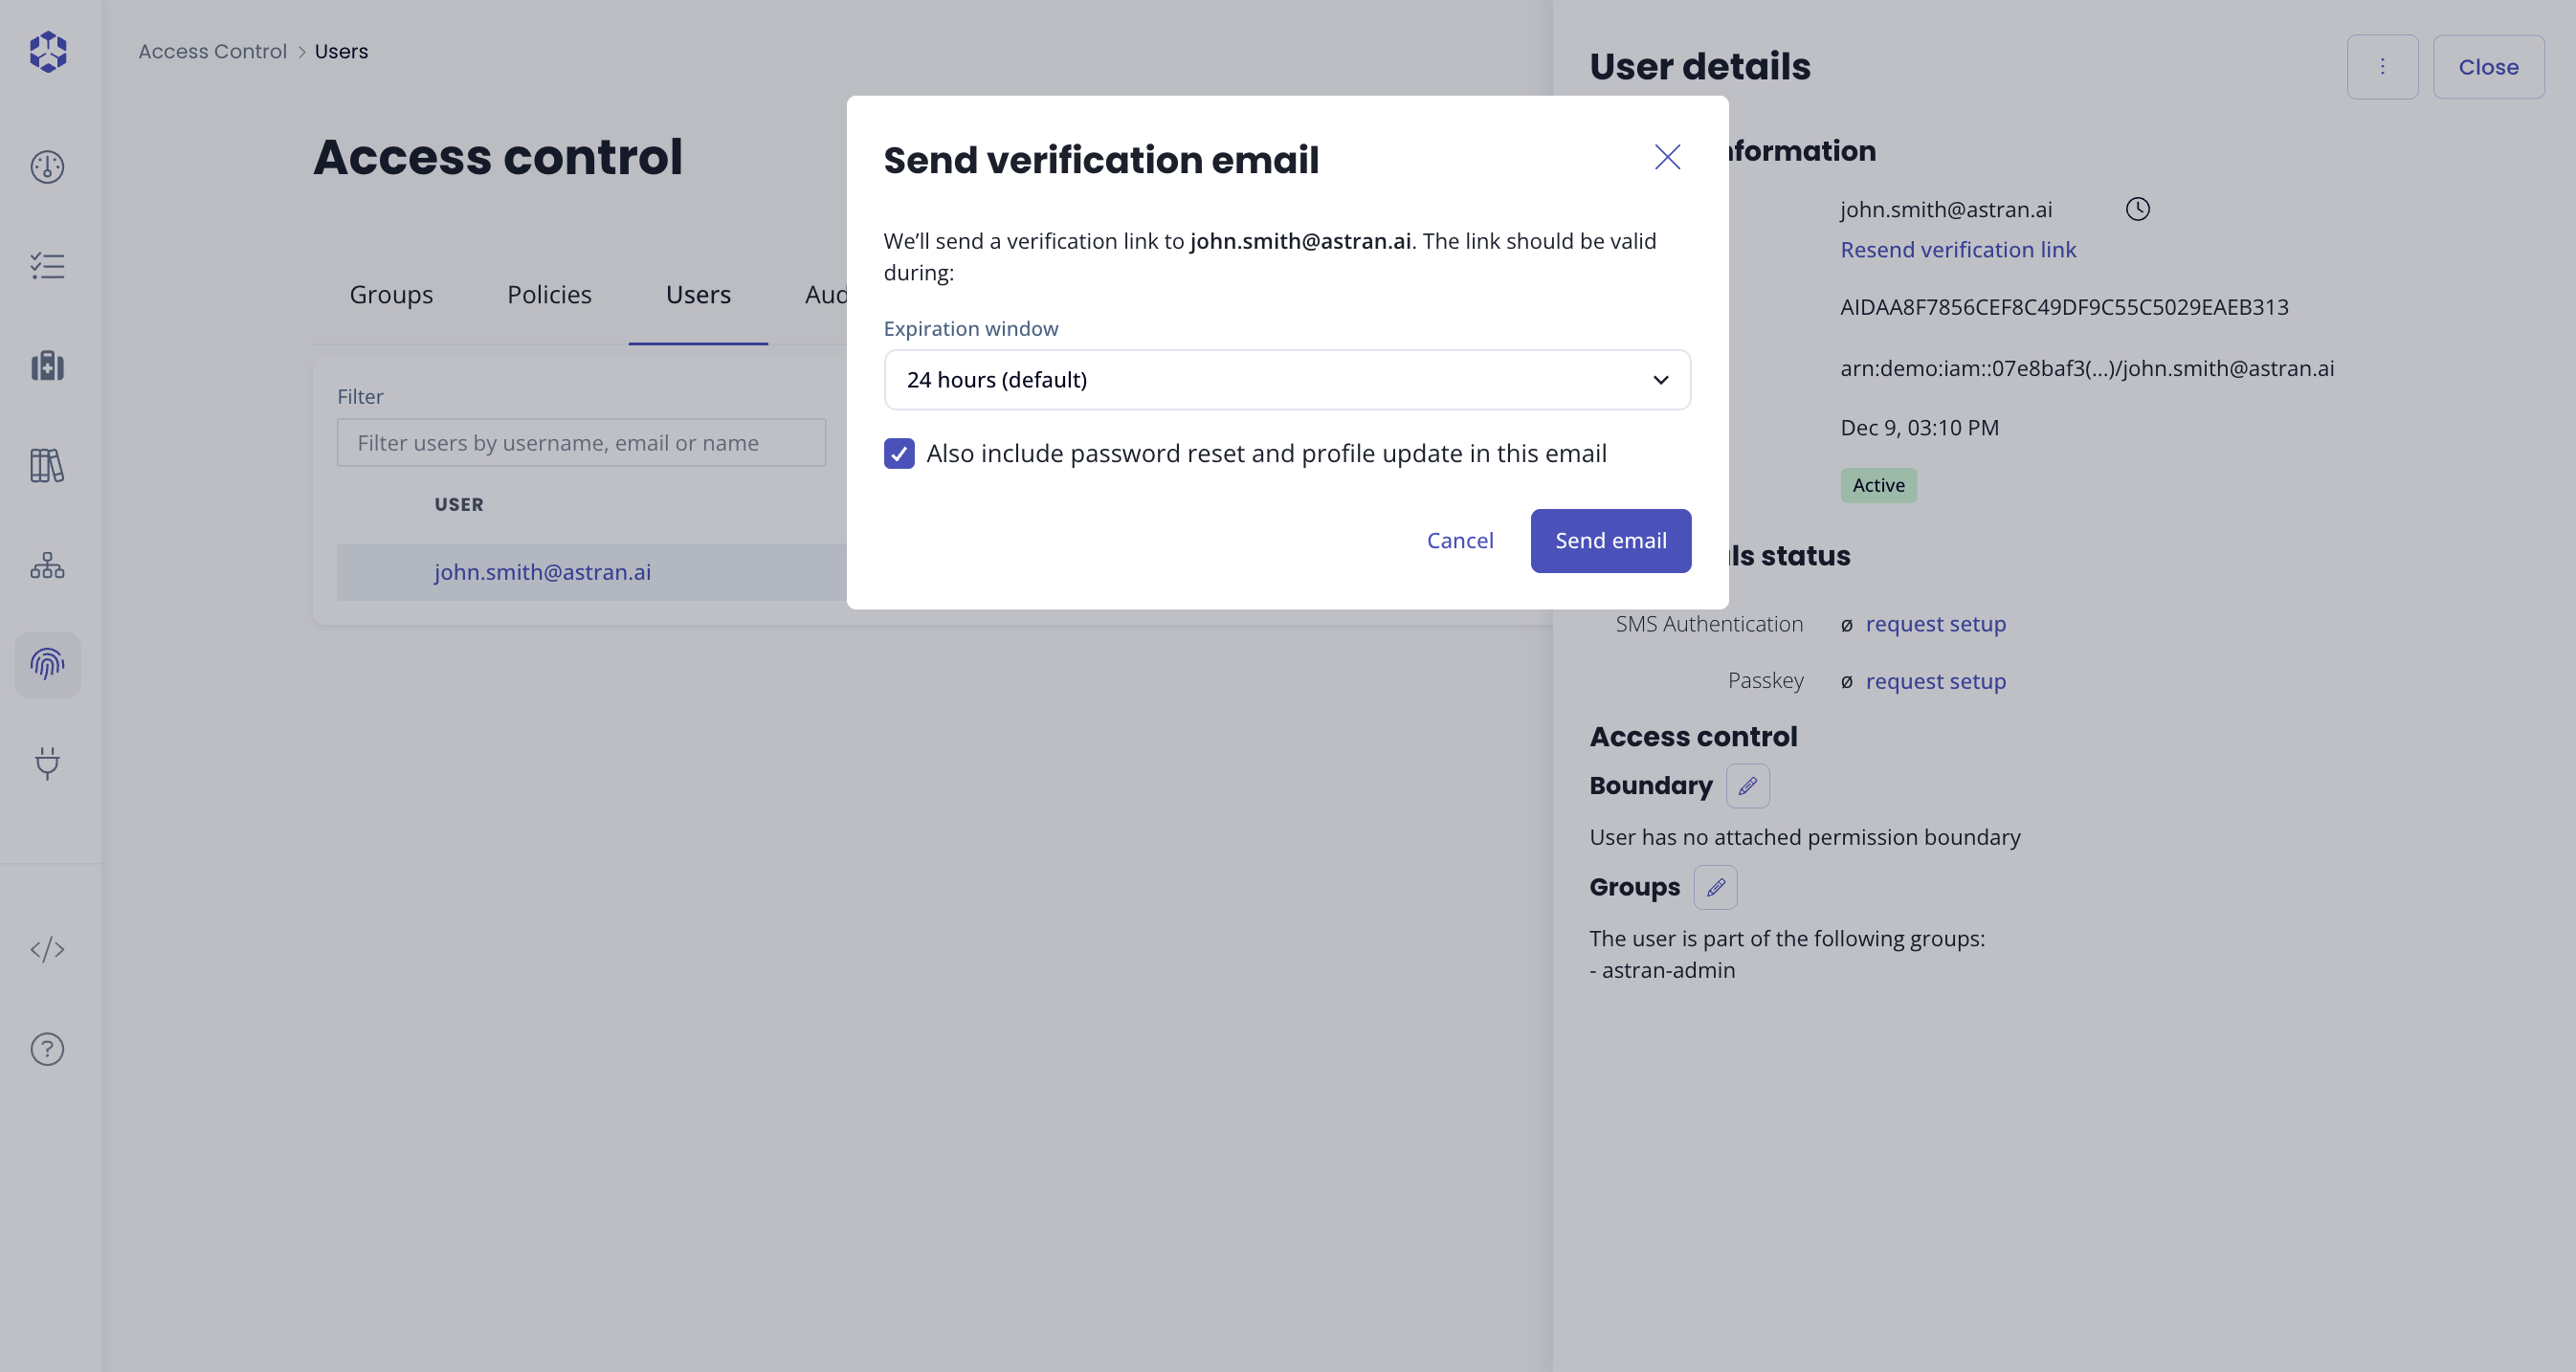
The verification email may include additional required actions (such as password reset or profile update), depending on your environment configuration and backend version.