Text editor
Markdown features
We invite you to check out the Official Markdown page to get more familiar with markdown.
The standard features mentioned below are supported.
Heading
# Header 1
## Header 2
### Header 3
#### Header 4
##### Header 5
These headers will render with different font sizes, where Header 1 is the largest, and Header 5 is the smallest.
✅ Do this
# Here's a Heading
❌ Don't do this
#Here's a Heading
Bold
To create bold text, surround it with ** or __, e.g. **bold text**
✅ Do this
Love**is**bold
**Love is bold**
❌ Don't do this
Love__is__bold
**Love is bold **
Italic
To create italic text, surround it with * or _, e.g. *italic text*
Strikethrough
To create strikethrough text, surround it with ~~, e.g. ~~strikethrough text~~
Blockquote
Blockquotes are created by starting a line with >
e.g.
> blockquote
✅ Do this
Try to put a blank line before...

> This is a blockquote

...and after a blockquote.
❌ Don't do this
Without blank lines, the formatting may not render correctly.
> This is a blockquote
Don't do this!
Ordered List
Ordered lists are created by placing a number followed by a dot (.) at the beginning of each line.
1. First item
2. Second item
3. Third item
Unordered List
Unordered lists are created by placing a '-' at the beginning of each line.
- First item
- Second item
- Third item
✅ Do separate lists with blank lines before and after each list.
Inline code
Inline code is done using backticks
`inline code`
Horizontal Rule
Horizontal rules are created by placing --- on a line.
✅ Do this
Some content.

---

Some other content.
❌ Don't do this
Some content.
---
Some other content.
Link
Links are created using the following syntax: [Name of your link](https://url-to-your.link.ext)
Image
Images are embedded using the following syntax: 
Table
Simple tables can be rendered with the following:
| Syntax | Description |
| ----------- | ----------- |
| Header | Title |
| Paragraph | Text |
The rendering will have a similar appearance as the following table.
| Syntax | Description |
|---|---|
| Header | Title |
| Paragraph | Text |
Code Block
Code blocks are created using the following syntax. The language name (here json) is optional.
```json
{
  "firstName": "John",
  "lastName": "Smith",
  "age": 25
}
```
Astran features
Alerts
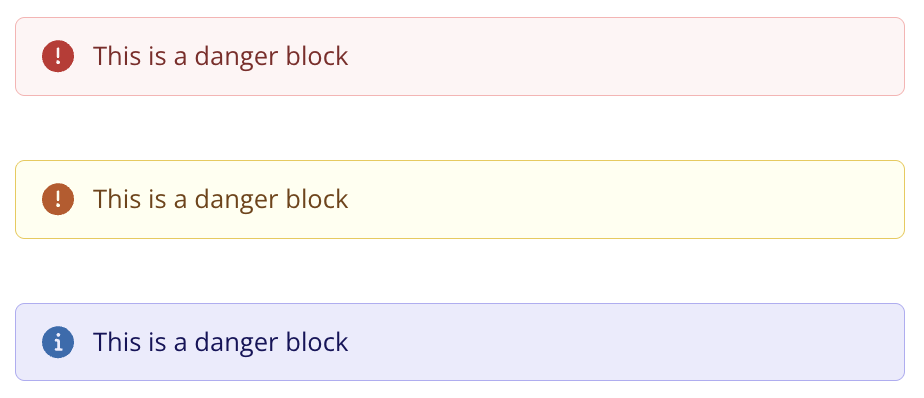
danger, warning and info blocks are created using the following syntax.
::danger
Danger alert
::
Replace ::danger with ::warning or ::info to change the alert type as needed.
✅ Do separate alert blocks with blank lines before and after.
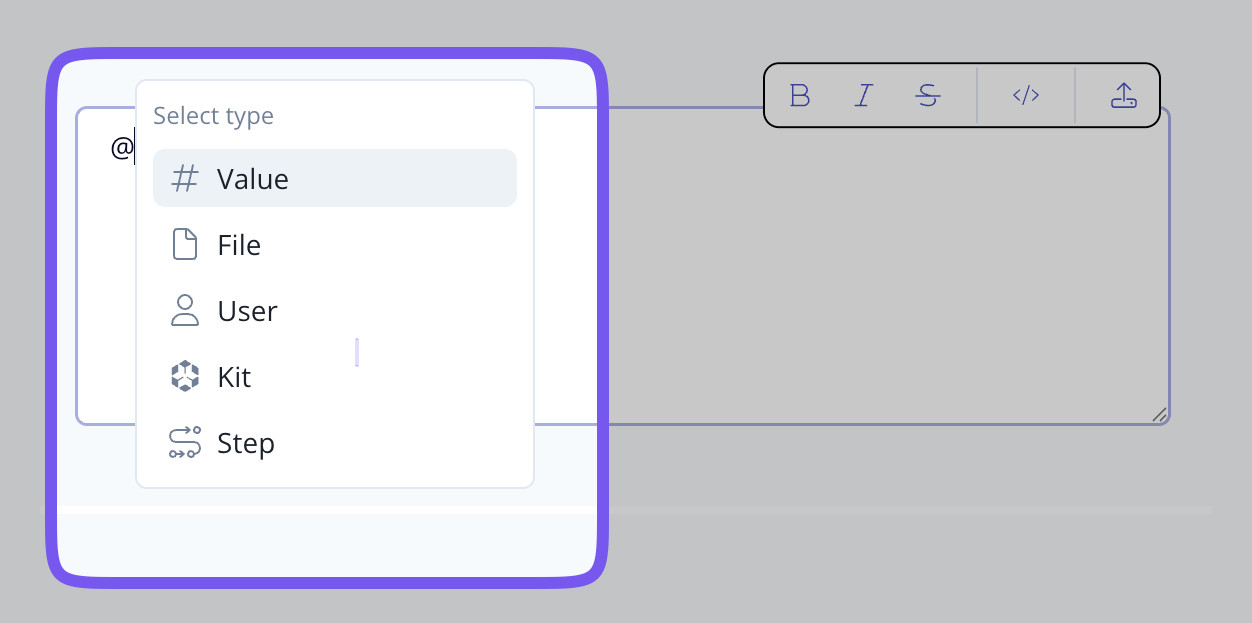
Smart selector
You can trigger the smart selector by typing @ in the text area. In case the @ is preceded by a character, nothing will happen.
Reference a step
You can select 'Step' to reference a step. It will reference its index. Be aware that if you move steps (i.e. step 3 becomes step 1), the step referenced will not be updated (i.e. if you pointed to step 3, it will still point to th newest step 3).
Link to internal documents
A text in the form @file:"/path/to/a/document/in/bucket.extension" will be interpreted as an internal link.
We recommend naming your files and folders without quotes as these will not be interpreted correctly as links to files.
This link will be clickable and will try to open the associated document for preview.
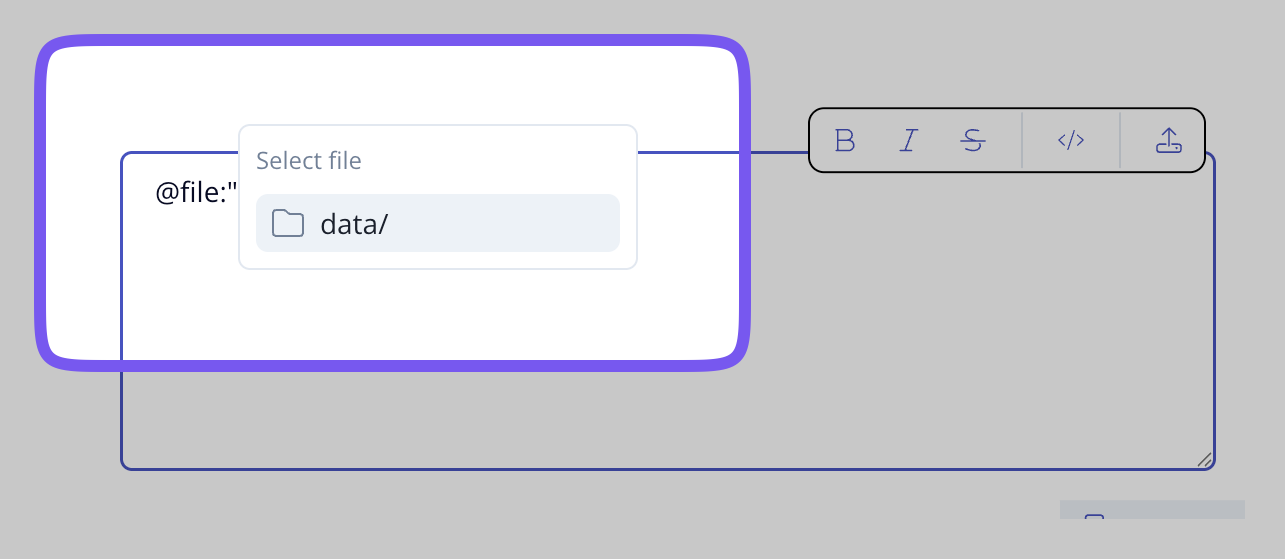
You can upload a file in your kit by dropping it in the text area (1 file at a time) or clicking on the Upload file icon in the toolbar.
This will upload the selected file in the /data prefix of the bucket associated to your kit.
For backward compatibility, you can still use /path/to/a/document/in/bucket.extension to reference internal documents.
Yet, these will be replaced by the associated @file:'path/to/a/file.extension'
We do not support referencing folders in checklist - you must reference directly a file. Since at execution time, the access to the file is granted to the users referenced as Managers, Contributors or Viewers, this constraints avoids having them granted the rights to files they should not have access to.
Embedding documents
Embed documents are created using the following syntax .
The embedded document must exist at /link/to/document.pdf within the bucket associated with the checklist.
It will render the document in case its format is supported. Otherwise, a link to download it will be available. Documents which are more than 5MB will not be rendered.
Referencing a file from another bucket
You can reference a file from another bucket by using the following syntax @bucket:"bucket-name/link/to/document.pdf" where bucket-name is the name of the bucket you want to reference and link/to/document.pdf is the path to the file within the bucket.
Please note that the permissions to access this files are not granted to the users referenced as Managers, Contributors or Viewers. They need to be granted explicitely through the s3 permissions. Namely, the user will need to have the s3:ListAllMyBuckets, s3:ListBucketVersions and s3:GetObjectVersion permissions.
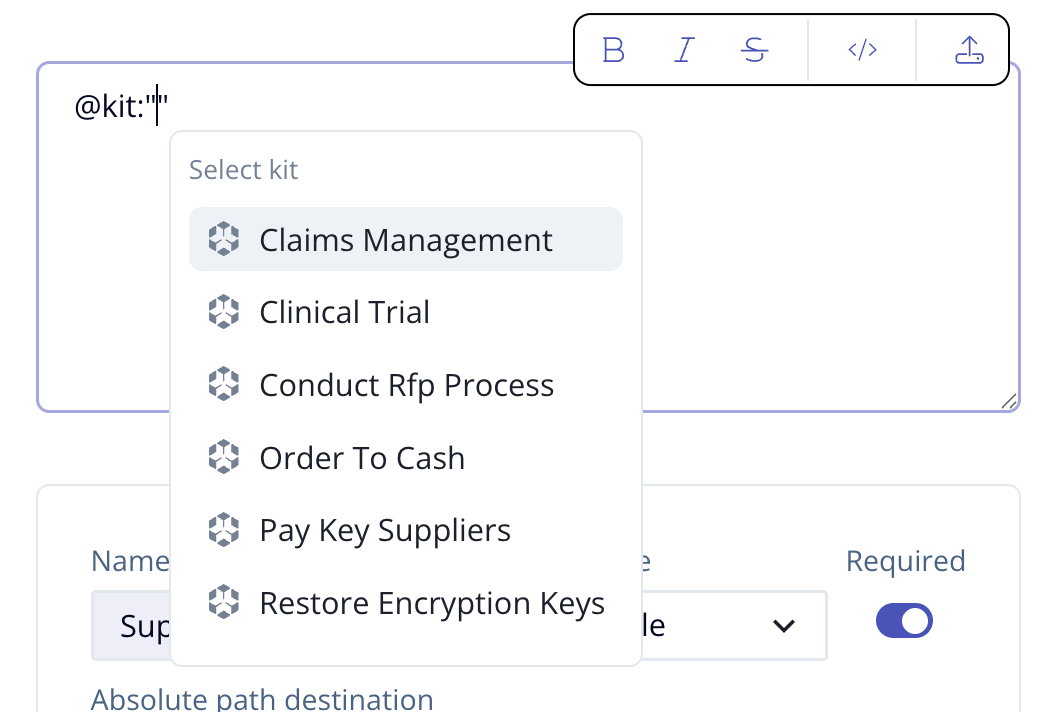
Referencing a kit
You can reference a kit by using the following syntax @kit:"kit-arn" where kit-arn is the ARN of the kit you want to reference.
We recommend you to use the smart selector to select the kit you want to reference.
Clicking on the kit reference in the checklist will open this kit in a new tab.
Referencing a value of the checklist
You can reference a value of the checklist by using the following syntax @value:"value-name".
Note that if the field name is modified, the reference will break.
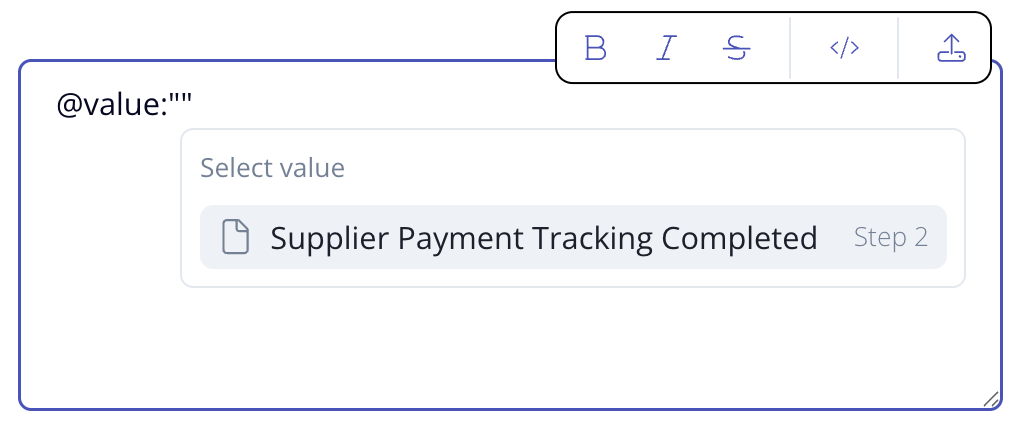
This feature allows you to quote a value from a previous step in the checklist to make it easier for user to access data without having to navigate through steps.